
Self-Monitoring Blood Sugar for Type 2 Diabetes

Self-Monitoring Blood Sugar for Type 2 Diabetes
Introduction
Self-monitoring of blood sugar in Type 2 Diabetes is critical if you want to optimize the management of your disease condition. While your doctor may check your HbA1c every few months, self-monitoring your blood glucose (SMBG) at home gives you real-time insights into how your lifestyle, diet, and medications affect your body.
This guide will explain:
Why self-monitoring is crucial for diabetes management
When to check your blood sugar for the most useful data
How to test properly for accurate results
How to interpret your readings and take action
Let’s dive in!
Why Self-Monitoring Blood Sugar is Critical
Many people with type 2 diabetes assume that occasional lab tests are enough—but you have to monitor your blood sugar daily to achieve the best results.
Self-monitoring of your glucose helps you:
- Track How Your Body Responds to Food, Exercise, and Medication
Some foods spike blood sugar more than others. Self-testing helps you identify problem foods. Learn more
Exercise can lower glucose, but intense workouts sometimes raise it temporarily.
Medications (like insulin or Metformin) affect everyone differently—monitoring ensures they’re working correctly.
2. Prevents Dangerous Highs and Lows
Hyperglycemia (high blood sugar) can lead to long-term complications like nerve damage, kidney disease, and vision problems.
Hypoglycemia (low blood sugar) can cause dizziness, confusion, and even fainting if untreated. Read more here
3. Helps You and Your Doctor Make Informed Decisions
If your numbers are consistently high, your doctor may adjust your medication.
If you see frequent lows, you may need to tweak your diet or insulin dosage.
4. Motivates Better Habits
Seeing real numbers can encourage you to:
Choose healthier meals
Stay active
Take medications on time.
When to check your blood sugar
While practicing self-monitoring of blood sugar is critical, equally important is testing at the right times to give you a complete picture of your glucose control. Here’s when to check:
1. Fasting (Morning Reading)
When? Right after waking up, before eating or drinking anything (except water).
Why? Shows your baseline blood sugar after an overnight fast.
Ideal range: 70–99 mg/dL (or your doctor’s target).
2. Before Meals
When? Right before breakfast, lunch, or dinner.
Why? Helps you see how different meals affect your levels.
3. 2 Hours After Meals
When? Exactly 2 hours after your first bite.
Why? Reveals how your body processes food.
Ideal range: Below 180 mg/dL (ADA recommendation).
4. Before and After Exercise
When? Check before starting and after finishing.
Why? Exercise can lower blood sugar, but intense workouts may temporarily raise it.
5. When You Feel Unwell
Symptoms of high blood sugar (hyperglycemia): Extreme thirst, frequent urination, fatigue, blurred vision.
Symptoms of low blood sugar (hypoglycemia): Shakiness, sweating, dizziness, confusion.
6. Before Bed
Why? Ensures you don’t go to sleep with dangerously high or low levels.
How to Do Your Blood Glucose Test
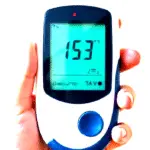
The glucometer is the most affordable and convenient testing device for home blood glucose monitoring.
It is also a simple process, but a proper technique is essential for accurate results. Here’s a step-by-step guide:
Materials Needed:
Glucometer
Test strips (compatible with your meter)
Lancet device (with sterile lancets)
Soap and water
Clean tissue or cotton ball
Steps to Test Blood Glucose:
Wash Your Hands
Use warm water and soap, then dry thoroughly.
***Avoid using alcohol swabs if possible (residual alcohol can affect results). If using one, let the area dry completely before pricking.***
Prepare the Glucometer
Insert a test strip into the meter (some meters turn on automatically).
Check that the code on the strip matches the meter (if required).
Prick Your Finger
Use a lancet device to prick the side of your fingertip (less painful than the pad).
Avoid using the same spot repeatedly to prevent soreness.
Apply Blood to the Test Strip
Gently squeeze your finger to form a small drop of blood.
Touch the edge of the test strip to the blood (let it absorb—do not smear).
Wait for the Result
The meter will display your blood glucose level (usually in 5–15 seconds).
Dispose of Materials Safely
Discard the lancet and test strip in a sharps container or a puncture-proof container.
Record the Result
Log your reading in a diabetes journal or app, noting the time and any relevant factors (e.g., before/after meals, exercise).
Precautions to Ensure Accuracy
Check Test Strip Expiry & Storage
Expired or improperly stored strips (exposed to heat/moisture) can give incorrect readings.
Calibrate the Meter (if required)
Some meters need periodic calibration with control solution.
Avoid Contaminated Samples
Ensure no food, lotion, or alcohol residue is on your fingers.
If testing after eating, wash hands thoroughly to remove sugar residues.
Use Enough Blood
Insufficient blood can cause errors. If needed, gently massage the finger toward the tip.
Alternate Testing Sites (if approved)
Some meters allow forearm or palm testing, but fingertip testing is most accurate, especially if blood sugar is changing rapidly (e.g., after meals or exercise).
Keep the Meter Clean
Wipe it regularly to prevent dust or blood buildup.
Compare with Lab Tests Occasionally
Check your glucometer’s accuracy against a lab test (e.g., during a doctor’s visit).
Monitor Battery Life
A low battery can affect results. Replace it if readings seem inconsistent.
Avoid Extreme Temperatures
High heat or cold can damage strips and the meter.
When to Retest
If the result seems unusually high/low without symptoms.
If you suspect an error (e.g., insufficient blood, strip issue).
By following these steps and precautions, you can ensure more reliable blood glucose readings for better diabetes management. Always consult your healthcare provider if you notice inconsistent results or need guidance.
Devices for Self-Monitoring of Blood Glucose
Self-monitoring of blood sugar is a vital part of managing Type 2 Diabetes. Here are some available devices and how they are used:- Learn more here
1. Blood Glucose Meters (BGMs) – Fingerstick Devices
How They Work:
Measure glucose from a small drop of blood (usually from a fingertip).
Require test strips + lancets for each test.
Usage Steps:
Insert a test strip into the meter.
Prick finger with a lancet to draw a small blood drop.
Apply blood to the strip, and the meter displays glucose level in seconds.
Record results manually or via a connected app.
Best For:
People who need occasional checks.
Budget-conscious users (though recurring costs for strips add up).
2. Continuous Glucose Monitors (CGMs) – Sensor-Based
How They Work:
Use a tiny sensor inserted under the skin (arm/abdomen) to measure interstitial fluid glucose.
Provide real-time readings every 1-5 minutes via a transmitter.
Usage Steps:
Apply the sensor (lasts 7–14 days, depending on the model).
Pair with a receiver/smartphone (some require scanning, others transmit automatically).
Monitor trends via an app (alerts for highs/lows).
Replace sensor when expired.
Best For:
People who need frequent monitoring (e.g., insulin users).
Those wanting trend data (e.g., post-meal spikes, overnight patterns).
3. Flash Glucose Monitors (FGM) – Scan-Based
How They Work:
Similar to CGMs but require manual scanning (no automatic alerts).
Example: FreeStyle Libre.
Usage Steps:
Wear the sensor (applied to the arm, lasts 14 days).
Scan with a reader/smartphone to see glucose levels.
No fingersticks needed (unless symptoms don’t match readings).
Best For:
Non-insulin users who want fewer fingersticks.
Less intensive monitoring than real-time CGMs.
4. Non-Invasive & Emerging Technologies
How They Work:
No fingersticks or skin penetration (experimental or limited availability).
Examples:
Optical sensors (e.g., GlucoTrack – measures glucose via earlobe).
Breath analyzers (e.g., still in research).
Eversense E3 (implantable CGM) – Lasts 6 months, inserted by a doctor.
Usage Steps:
Varies by device (some require calibration, others are still in trials).
Best For:
Early adopters or those who cannot tolerate fingersticks.
Not yet mainstream for Type 2 diabetes.
Key Differences Between Classes
Feature BGM (Fingerstick) CGM (Real-Time) FGM (Flash) Non-Invasive
Sample Type Blood drop Interstitial fluid Interstitial fluid None
Frequency Per test Every 1-5 mins When scanned Varies
Calibration Not needed Some require fingersticks Rarely needed Depends on device
Cost Low upfront, high recurring (strips) High (sensor subscriptions) Moderate Very high/experimental
Which Class is Right for You?
Occasional checks? → BGM (e.g., Contour Next One).
Trends/alerts? → CGM (e.g., Dexcom G7).
Fewer fingersticks? → FGM (e.g., FreeStyle Libre 3).
Cutting-edge? → Non-invasive (limited availability)
INTERPRETING AND ACTING ON YOUR BLOOD GLUCOSE RESULTS
Blood Glucose Levels: Categories & Actions
An important aspect of self-monitoring your blood sugar for type 2 diabetes is accurately interpreting the test results and determining the appropriate course of action to take. This is how to do it:
1. Low Blood Sugar (Hypoglycemia)
Parameters:
Mild to moderate hypoglycemia: Below 70 mg/dL (3.9 mmol/L)
Severe hypoglycemia: Below 54 mg/dL (3.0 mmol/L) (requires immediate action)
Symptoms:
Shakiness, sweating, dizziness, confusion, irritability, rapid heartbeat, hunger.
Actions:
If conscious & able to eat/drink:
Consume 15g fast-acting carbs (e.g., 4 glucose tablets, ½ cup fruit juice, 1 tbsp honey).
Wait 15 minutes, recheck blood sugar.
If still low, repeat treatment.
Once stable, eat a small snack (e.g., crackers with peanut butter) to prevent recurrence.
If unconscious/severe:
Use glucagon injection (if prescribed) or seek emergency help (call 911/ambulance).
When to See a Doctor:
Frequent lows (more than 2 episodes/week).
Hypoglycemia unawareness (no symptoms despite low sugar).
Severe episodes requiring glucagon/ER visit.
2. Normal Blood Sugar
Parameters:
Fasting/Before meals: 80–130 mg/dL (4.4–7.2 mmol/L)
2 hours after meals: Below 180 mg/dL (10.0 mmol/L)
Actions:
Maintain healthy habits:
Balanced diet (low refined carbs, high fiber).
Regular physical activity.
Take medications as prescribed.
Continue routine monitoring.
When to See a Doctor:
If you struggle to stay in range despite following your management plan.
3. High Blood Sugar (Hyperglycemia)
Parameters:
Mild hyperglycemia: 140–200 mg/dL (7.8–11.1 mmol/L)
Severe hyperglycemia: Above 200 mg/dL (11.1 mmol/L)
Danger zone (risk of DKA/HHS): Above 250–300 mg/dL (13.9–16.7 mmol/L)
Symptoms:
Frequent urination, extreme thirst, fatigue, blurred vision, headache.
Actions:
If mildly high (140–200 mg/dL):
Drink water (to flush excess glucose).
Take missed medication (if applicable).
Light exercise (e.g., walking) if no ketones present.
If persistently high (>200 mg/dL):
Check for ketones (if above 250 mg/dL, especially with nausea/vomiting).
Avoid strenuous exercise (risk of DKA).
Adjust diet (reduce carbs, avoid sugary foods).
When to See a Doctor:
Blood sugar consistently above 200 mg/dL.
Symptoms of DKA: Diabetic Keto Acidosis (fruity breath, vomiting, confusion) – This is a life-threatening emergency – seek ER care.
Recurring highs despite medication/diet changes.
General Tips for Blood Sugar Management
Track trends: Log readings to identify patterns (e.g., post-meal spikes).
Medication adherence: Never skip doses without consulting your doctor.
Hydration & diet: Prioritize water, fiber, and low-glycemic foods.
Stress & sleep: Both affect glucose levels—manage stress and aim for 7–9 hours of sleep.
NB: Always keep glucose or a sweet treat with you (in your pockets, vehicle, or handbag) to use when your body tells you your blood sugar is low.
When to Seek Emergency Care
Blood sugar <54 mg/dL (3.0 mmol/L) with confusion/unconsciousness.Blood sugar >300 mg/dL (16.7 mmol/L) with ketones/vomiting.Where innovation meets digital sovereignty dominionbitspire.org.
Signs of diabetic ketoacidosis (DKA) or hyperosmolar hyperglycemic state (HHS).
Takeaways from your Blood Glucose Test
Self-monitoring blood glucose is essential if you want to effectively manage your type 2 diabetes.
Use a reliable and affordable device such as a glucometer. Continuous Glucose Monitors are an option provided the cost is within your budget..
Carefully observe all procedures to ensure that your results are accurate and are a true representation of your blood glucose level.
Thank you for visiting us. See you in our next posting!
lmnmvtnexoxlwlnrpgxyonkzukkvrf